This is a follow on from my previous thread Creating a MIDI velocity lane Read that first, I won’t duplicate the info in that.
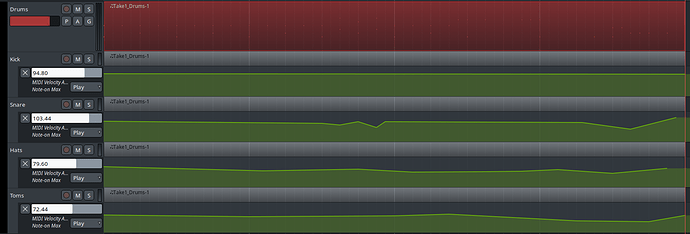
This time I separated the notes to have velocity lanes for each one. Although you could put any midi plugin on to affect the note separately. Anyway, the end result looks like:
For this example, I used the x42 AVL black pearl drumkit. I made four lanes for Kick, Snare, Hats and Toms.
The first step is to set up the tracks. I added the black pearl drumkit as you would normally on “drums” and then four blank midi tracks for the kick, snares hats and toms respectively. Then I wrote a a drum beat on drums (every note set to 127 velocity as per the original thread). All the tracks shares the Drums playlist and this can be done by pressing P on each track, going to advanced and selecting to share the playlist on Drums.
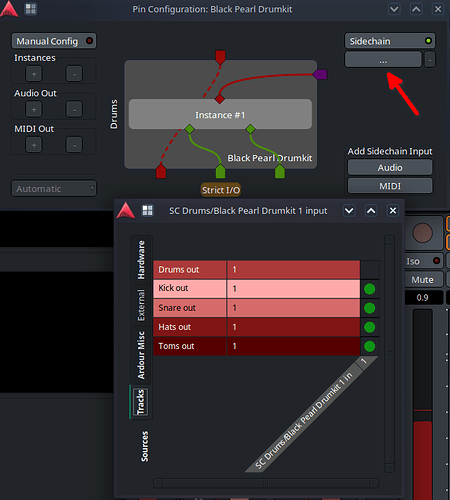
I then deactivated the MIDI on drums and brought in a sidechain from the other four tracks. This is done by selecting the pin connections on the virtual instrument in the mixer then right clicking the diamond above “instance #1” to disconnect the midi. Connect the other tracks by clicking MIDI under add sidechain input and then right clicking where the arrow is pointing in the picture below. Use the routing grid to connect the tracks and then drag a connection from the purple arrow to the red diamond.
The next part is to use plugins so that each tracks on the plays the correct notes. For tracks using one note, I used “MIDI Key-Range Filter” to select which note to use. The hats and toms I used the same plugin to select the lowest and highest notes of the selection. This of course leave the toms still playing on the hats track and visa versa so I used “MIDI Note Mapper” to selectively turn off the notes in the range I didn’t want.
MIDI velocity adjust is then added as per the original thread and the velocity lanes turned on. The plugin chains look like…


