Using Av Linux and Ardour, how do I record four live channels?

Dear Audiophile,

What hardware configuration would you recommend for recording four tracks using Ardour on the brand new AV Linux 23.1? More specifically, how much RAM, how much CPU, and how much sound card would you recommend for the laptop, and which external devices (mixers?) would you recommend to go with that computer?

Backstory:

I am new to the world of audio recording. My goal is to create a system for precisely locating the origin of mechanical noises coming from moving automobiles.

The idea is for a technician in the passenger seat to be able to watch on a laptop the outputs from all four piezo discs while a driver operates the vehicle in a manner that re-creates the reported noise-related issues.

My current plan is to have four piezo disc microphones attached to various suspect mechanic parts feeding Shure BLX wireless bodypacks. BLX receivers have mic-level outputs. I am not attached to using Shure or BLX but that is where I am at in my research.

Ideally, the system would include a fifth channel for capturing the audio experience inside the vehicle, including verbal comments from people inside the vehicle such as “right there, yep, that’s the rumble. There it goes again” etc.

All feedback, suggestions, or harsh criticisms are welcome. Thanks for reading.

  • Recording four (or five) audio tracks simultaneously in Ardour won’t cause any machine built in the last twenty years to break a sweat: the task is I/O bound, not CPU or RAM constrained.
  • The cheapest four-channel USB audio interface will be fine, although you’ll likely have to go up to a six- or eight-channel interface to get five microphone preamps.
  • I would record to a USB SSD, rather than a spinning drive, both for performance and for reliability.
1 Like

I interpret that to mean that the USB audio interface will be doing all the heavy lifting, not the laptop’s CPU or RAM. Am I reading that correctly?

It’s not particularly CPU or RAM intensive that particular operation is more about storage. I have a 10 year old laptop with an i3 processor and 2Gb of RAM in it that easily does 16 channels from my mixer at live gigs where I need a mobile rig. For 4 channels your needs are quite modest for the recording part… It’s the adding of effects and synthesis that become RAM and CPU intensive.

1 Like

An affordable but good quality audio interface is the Behringer UMC404HD. It has 4 inputs that can accept any signal (line/inst/mic) and can be powered via USB so long as phantom power is not activated, but it is not capable of capturing 5 microphone signals simultaneously. The next model up in the same line is the Behringer UMC1820. It can capture 8 microphone signals simultaneously (expandable to 16), but it is much larger in size and cannot be powered by USB. I have owned that device for several years and have been pleased with it. The Focusrite Scarlett 18i8 can capture 4 microphone signals in a small form factor, and it has 4 additional line inputs where mics powered by external preamps could be added, but it cannot be powered by USB. The 18i8 requires additional software to access all of its features, which adds a layer of setup complexity compared to the UMC line, but its overall build quality may be a point of consideration for a commercial environment. The 18i8 additional control software, beautifully designed and open source thanks to its author, is available here:

2 Likes

So this is likely not what you want to hear, but it probably should be said just in case.

My suggestion is not to use a computer/Ardour/etc. for the recording. Instead utilize a field recorder for this purpose. I would also suggest the Shure BLX wireless mics are not great for this purpose, but instead look for field/ENG wireless kits, and build yourself a bag ala a film production use. Of course you could even skip the field recorder in some circumstances and utilize individual small portable recorders that can be timecode sync’d, Tascam, Diety, Zoom, all have solutions that might work for this. That way you aren’t worried about wireless RF coordination, etc. and instead focus on placing mics where you need them.

AFTER the recording if you want to edit etc. then taking in to Ardour becomes a viable possibility IMO.

   Seablade
4 Likes

This makes a lot of sense. It would be a much simpler setup.

Another thing to consider would be to use “jack/time machine” (not the Apple backup thing) after starting jack with QjackCtl you can open timemachine in a terminal and with command lines and add as many inputs as your interface has, then connect them using QjackCtl. The advantage is it when you hit the record button it has already recorded the noise after you hear it saving lots of disc space (and you can set the number of seconds it pre-records)
It saves the recordings timed-stamped so maybe making a 5th channel unneeded ?
Than bringing it all into Ardour for a listen . I’ve used this recording live because you never know if the performer will say something insightful before a song. (be aware the default format is .wav64 but you can change that also)
hope this makes sense

1 Like

One option is to use a stand-alone 8 track recorder to record to a SD - card. I think this would simplify the workflow.

1 Like

I’ve observed that all pocket/bodypack recorders that have timecode capability are PRICY. Are you saying that with QjackCtl the recorders wouldn’t need to have built-in timecode? Are you saying that QjackCtl would handle the time coding aspect?

Fascinating. There really are some interesting options for how to accomplish this. This Zoom R20 seems to be the middle road - where individual timecoded mini-recorders are on one end (no equipment in the car) and recording with a laptop is on the other end (lots of equipment in the car).

So I am a bit confused, you mentioned above 4 channels of wireless mics, even BLX is about $500 channel (And not something I would reach for generally honestly but may be fine for your purposes). Add on top the cost of the laptop and audio interface you are discussing.

Compared to that $200 a channel for say a Tascam 10L Pro, and $150 for a Atomos Blue to timecode sync them, seems like a pretty dang good deal and much cheaper than anything you were looking at?

While the above is based off Tascam, I am pretty sure Zoom has a similar setup as well.

Another alternative would be a simple handheld recorder like the Tascam Portacapture X8 ($500) or X6 and then do field wireless into it. If I was going to do that I would probably look at smaller kits that have a built in mic and do recording locally on the pack, like the Rode Wireless Pro series, still much cheaper than the BLX series, does local backup recordings in case of RF issues, and recording all into a single recorder means Timecode isn’t as big a deal (But still useful if you have ot pull the backup recordings).

The other thing to keep in mind with things like the Zoom R20, those are designed to be plugged into a wall, same as the BLX wireless mics. They don’t do well for field use as that often requires running off batteries to be mobile, and in your case to go on a test drive for instance. That is a large part of why I would personally stay away from them for this purpose.

  Seablade

EDIT: If you are using timecoded recordings, you don’t need to deal with QJackCTL, Jack, or anything like that. You would import into Ardour using the file timecode so that all of them line up correctly, and then just use ALSA with Ardour for editing in Linux (Or CoreAudio on Mac, ASIO on Windows, etc.). No need for Jack, as the recordings would be done before you ever edited.

1 Like

FWIW… I also have a Zoom LiveTrak R20 (more expensive full mixer version) It records to SDcard and for live sound remote recording it is pure heaven… no computer involvement at all until post-production…

The LiveTrack doubles as a multichannel USB interface and that aspect is fully supported on Linux but after a few live gigs I stopped schlepping a laptop and let the SDCard handle it, import into Ardour and mix to your hearts content later. At the gig your only concern is enabling record on the desired number of tracks and setting the channel gain trim pots to avoid clipping…

1 Like

Hi , this is off Ardour topic but yes the program “timemachine” (it
requires “jack”) is a recording program that saves the .wav files with a
time stamp by default. The timemachine program interface is big green
button that turns red while recording and by default has already
recorded the previous 10 seconds of audio that way you don’t need to
record until you hear the offending noise instead of needing to listen
to your entire road test. I don’t remember if “timemachine” is installed
in AV linux but is easy add . And I think the track limit is 8 but you
should look it up to be sure. Back when I used it for live recording I
would first start QjackCtl chose your interface, set frames(1024) and
periods to 3 (you don’t need low latency) then hit the start button,
then start timemachine from a terminal so you can set some parameters
-c the number of channels -f is the saved file format (set it to wav
) than hit the graph button on the QjackCtl window that should open a
window that allows you to connect the jack system capture (your
interface inputs) to the timemachine inputs . The timemachine button
also has level indicators so you can see if you have audio input. Hit
the green button it turns red and starts recording including the 10
seconds before you hit the button. Your project is very interesting
hope this works for you. Also someone mentioned the Behringer 4 channel
USB interface ,I think that would be a good choice

Peace

1 Like

Sorry for the mixed signals. My interest in BLX wireless radios was greatly influenced by their going rate on eBay which is closer to $150 per channel. For now, budget is a serious consideration.

However, thanks to your insistence, I see a few Tascam 10L Pro that sold on eBay for around $130. They would each require an AK-BT1 blue tooth adapter ($45 ea) in order to sync with the Atomos Blue. I agree that a set of these 10L Pros with BT adapters and Atomos Blue would be IDEAL! for my situation.

At the moment, I am feeling most inspired by the basic Tascam 10L (not pro) because used units are commonly sold on eBay for $40-$60. While I would not have any timecoding or remote control capability, I see this as a great way to prove the concept with minimal investment. I imagine using traditional clapperboard techniques for synchronizing the tracks. I can also imagine getting tired of that eventually and upgrading to the Pro system.

This post has taken me down quite a different path than I imagined. I really appreciate everyone’s efforts.

I’ll let the Tascam 10L idea settle in for a few days before making a purchase.

Here is the system that I ended up using for analyzing sounds coming from my car. It was a smashing success, very affordable, and very DIY friendly. Much thanks to all that gave input.

Overview:

I used 3 contact microphones and 1 TM-10L lapel microphone attached to four cell phones via TRS-TRRS adapters. Recordings were made using the open-source Audio Recorder app by Dmytro Ponomarenko and perfectly synchronized using the classic clapperboard technique initiated along with a stopwatch. Editing and analysis was efficiently completed using Audacity (sorry Ardour).

Detailed Steps:

1. Power on all 4 cell phones
2. Check that they have sufficient battery level for the full test
3. Establish/Verify color coded pairing of contact mics and cell phones (ie by attaching different colored tape to each pair)
4. Mount contact mics onto target components
    A. Clamps - its important that the microphone lead is firmly pressed against the component – a clamp is generally best for this type of constant pressing.
    B. Use a combination of painter’s tape, zip ties, and velcro straps to secure the cables near the leads. 
    C. Make written notes of which colors are associated with which components
5. Open Audio Recorder app on all four devices (do not attach contact microphones yet)
6. Begin recording audio on all devices and place them near each other
7. Ring a chime as you simultaneously start a stopwatch
8. Connect phone/recorders to contact mics and test for proper recording function
    A. Verify that phone-mic pairs are correctly color matched
9. Mount phones securely
10. Mount lapel mic/phone/stopwatch in cabin of vehicle
      A.  Attach lapel mic to your lapel
11. Begin testing
    A. When a target noise is heard verbally notate and create timestamp (lap time)
12. End testing once you have one or two good samples of the target noise
13. Transfer sound files from all four phones to a computer
    A. This can accomplished by using USB cables, email, SMS, or other cloud based transfer system such as GoogleDrive, ProtonDrive, OneDrive, etc.
14. Import sound files into Audacity
15. Delete all track information prior to the chime
16. Use timestamps and verbal notations to locate noise samples
17. Analyze sample data
        A. Trace the source of the noise by observing which track contains the loudest sample
18. Formulate conclusion or narrow hypothesis

Using this technique I was able to plainly see the causes of two different noises. In my first test I found that my ball joint was the source of a clunking sound. In my second test I found that my lower control arm bushings were the source of a squeak-moan-groan sound.

Detailed notes about system elements:


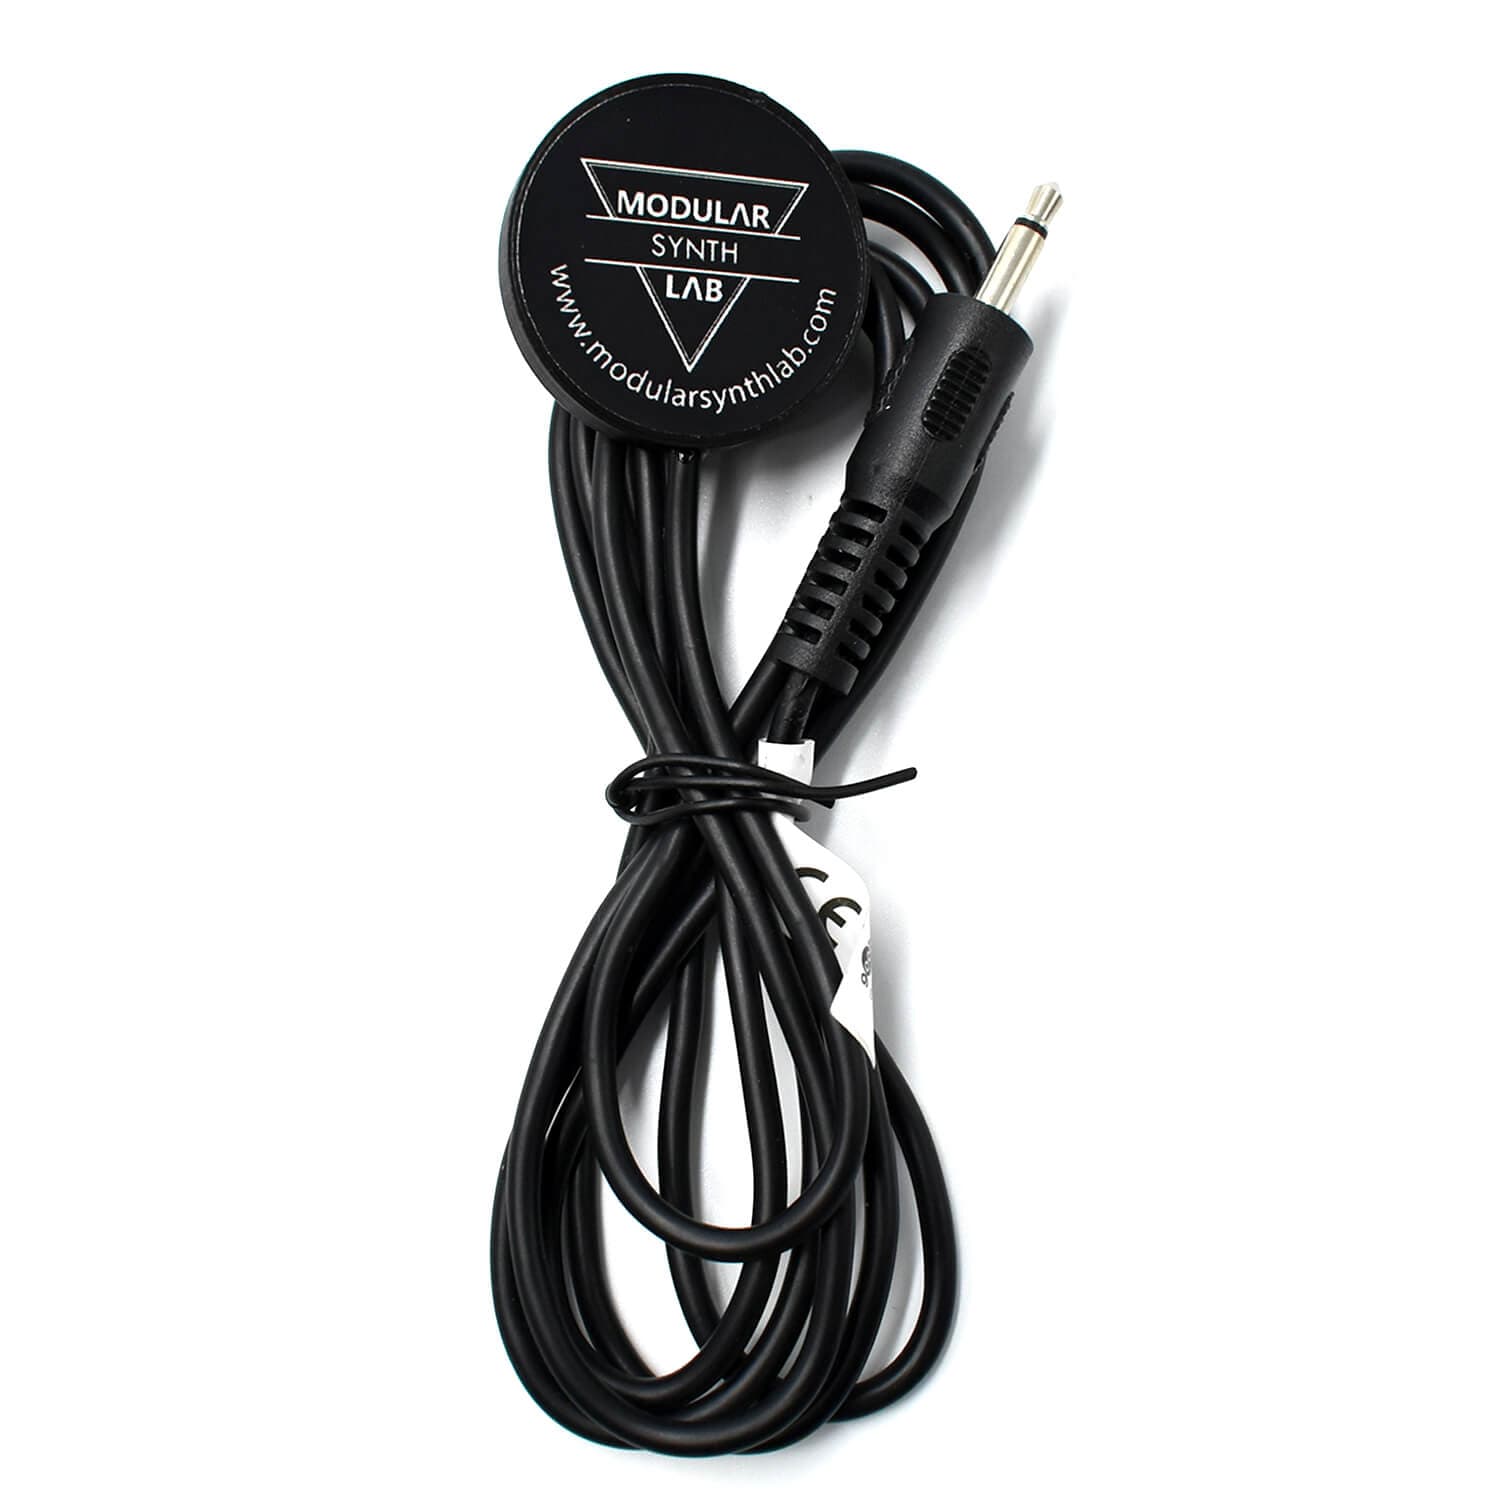
$20ea High Quality Piezo Contact Microphone, Piezo Transducer, 27mm, 120cm cable, mono jack 3.5mm by ModularSynthLab

TM-10L Lavalier microphone by Tascam. This microphone sells for $90 direct from Tascam. I think any decent lavalier would do just fine.

Cell phones: I used abandoned old phones laying around the house and got a couple more old cell phones on eBay with cracked screens for around $20 each.

TRS-TRRS adapters: $4 ea. I tried a few before I found this one. Some didn’t work at all. These were the cheapest and the best! Even though the contact mics actually have TS plugs, these adapters still worked for them and the lapel mic perfectly.
3.5mm TRS to TRRS Adater Cable, Microphone Adapter Cable Cord, TRS Male to TRRS Female Adapter, by Riqiorod

Overall cost: $100-$150

1 Like