Getting started with classical guitar recordings - Most important adjustments in Ardour?

Hello,

I would like to record with the classical guitar using Ardour. For this I’m using Rode M5 MP microphones and an audio interface from Behringer (UMC 204 HD). They might eventually be replaced with better equipment someday.

To get started, I looked at this quick guide from unfa on YouTube. So, I know how to make recordings with Ardour and have done so several times already. The results are satisfying. I even got rid of the side noise by adjusting the gain knobs on the audio interface.

So this is what my Ardour experience looks like at the moment:

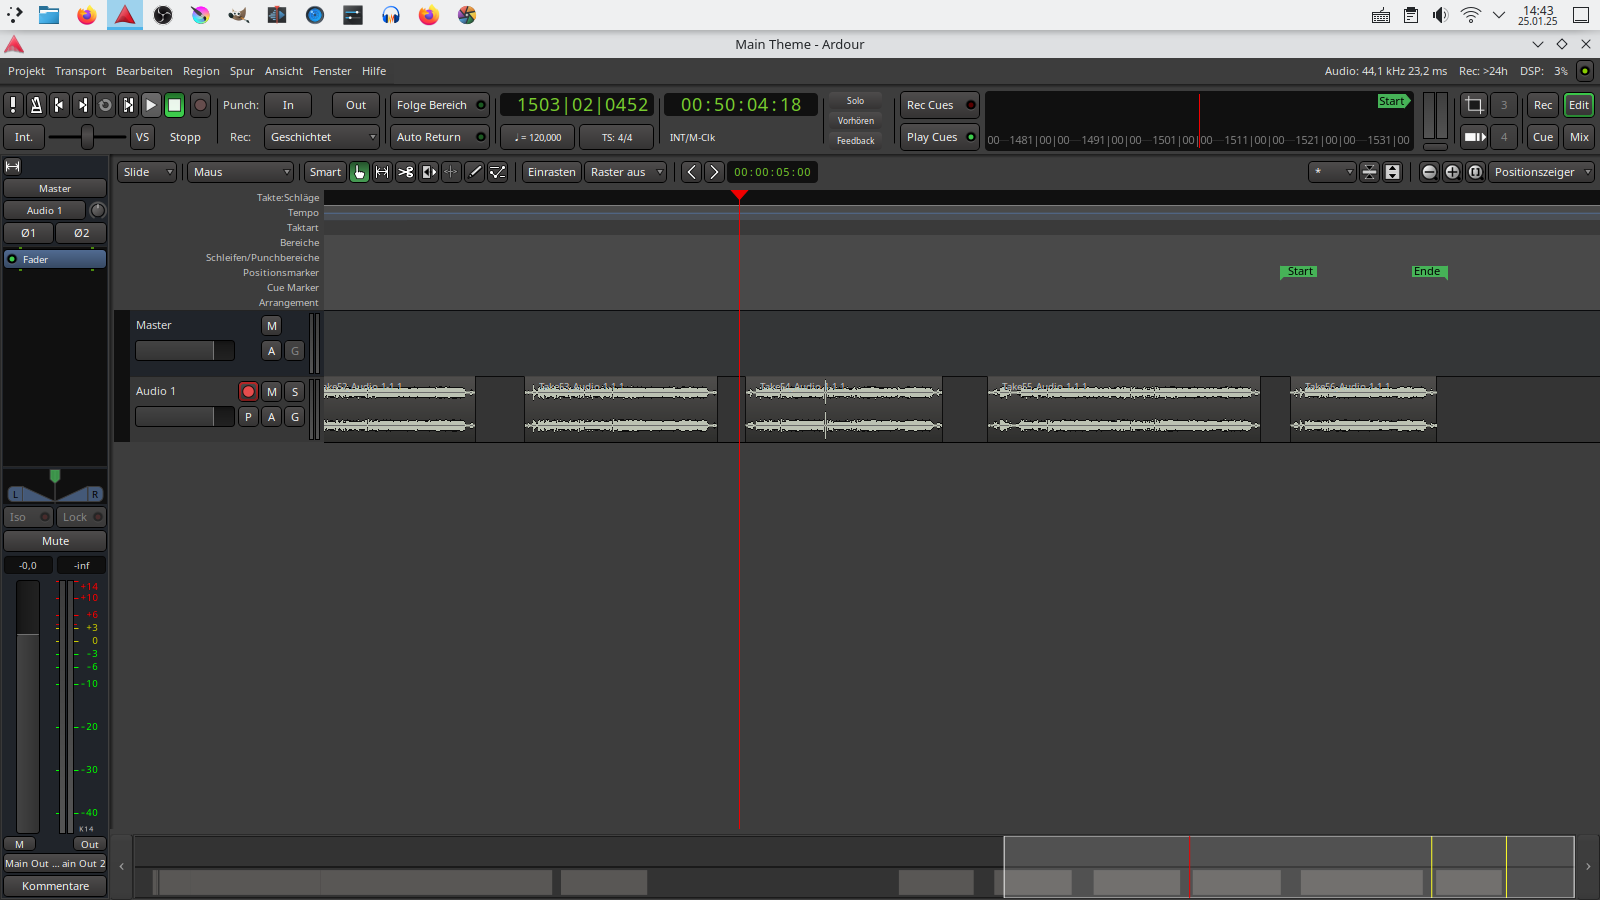
As can be seen, now I am faced in Ardour (as in probably any DAW) with a multitude of buttons, knobs, and menus, most of which I currently have no idea whether or not they are relevant for my purposes.

Ultimately, I simply want to create an audio track, which I’ll later combine with KdenLive in a subsequent step to create a video with sound.

So at the moment my questions come down to:

  • Which file formats should I use? I’m not particularly concerned about space-saving formats at the moment, so they can be high-resolution and space-intensive if it makes an audible difference.
  • As someone who is not necessarily a sound engineering aficionado and has limited time and motivation, which features of Ardour should I definitely take a closer look at?
    What do you think are the most important settings or adjustments I should definitely familiarise myself with?

Best,
Forumsnutzer

Don’t be mistaken by thinking that the UMC204HD is, somehow, not very good. From an audio quality point of view, it rivals interfaces costing 10 times as much.

The only reason I can think to upgrade it is if you need more inputs.

Watch this video:

Yes, learning how to gain stage (get the levels right to optimise sound quality and prevent clipping) is key.

The thing to start with is the recording setup: Ardour projects have a set sample rate which is fixed from when you first set up the project and configure the audio settings. In general, 44.1kHz or 48kHz are all you need here. 44.1kHz is CD quality. 48kHz is more commonly used on video.

Personally, I’m an advocate for 48kHz because not many people are burning CDs of their work these days.

The UMC204HD can actually go up to 192kHz sample rate, and some people record at those sample rates, but you don’t need to: 44.1kHz/48kHz captures everything that humans can hear and higher sample rates just create more data (it’s actually noise because it’s not audio data, and there have been suggestions that noise can actually make your audio sound worse).

The next thing would be file format. The file format used by Ardour internally is, by default, 32-bit FP which is more than good enough for any audio. You can change it, but there’s no need to, and no benefit for you in doing so.

The file format you export to is flexible, and this depends on the target. When you run the export (Session menu → Export) you have a bunch of export options which include CD, Youtube, etc. and you can create custom ones and save them if you frequently perform certain tasks.

The export can also include normalization, which adjusts the overall loudness of the exported tracks, and resampling which can change the output sample rate (in general you wont need this).

If your “target” is Kdenlive, I would chose “Wav (Tagged) 16 bit session sample rate”.

Cheers,

Keith

1 Like

Regarding this and with limited understanding of your project, if you are making a single-track, one-take recording of an acoustic instrument, I would look at the following:

  • Navigation - how to navigate the user interface generally, including switching between Edit and Mix modes, how to use the mixers, etc.
  • Region Editing - to understand how to trim empty space at the start and end of the region of the recording
  • Markers to understand how ranges are set (particularly important for exporting). The start and end markers are the main ones you care about
  • Metering - to understand “loudness” and “gain” and “normalisation”

These are all you need to edit a basic project.

Slightly more advance topics:

  • Automation - which allows you to (for instance) reduce the level for any silent parts of the recording so you don’t hear any background noise, or manually adjust the level of part of the performance it it sounds to loud or to quiet compared to the rest of the performance
  • Plugins - these are added to the track and allow you to tweak the sound in various ways, typical plugins are:
    • Equalisation - allows you to emphasis or reduce different frequencies. So, for example, if you find a particular note you play is rather “boomy” (which can happen due to room acoustics) you can use EQ to make it sound more natural (although, ideally, if you can fix the acoustics of the room in future that’s better)
    • Compression - allows you to adjust the “dynamic range” (the difference in level between the quiet and loud parts).
    • Reverb

A bunch of plugins are included with Ardour, and I would look at the ACE ones as a starting point. After that, if you are on Linux (the screen shot suggest you are) then the LSP plugins are great, as is Dragonfly Reverb and many others (it’s a minefield). You may find many of these can be installed with your package manager.

Cheers,

Keith

1 Like

By the way, the biggest upgrade you can do for your recordings is, almost always, to improve the acoustics of your recording environment.

Cheers,

Keith

4 Likes

Thank you, Keith, so much for taking the time to answer my questions so extensively! :slight_smile:
That was very helpful.

I am glad to hear that. Initially I bought it because it was inexpensive and looked neat. I am surprised that it seems to be that good, actually.
The video looks interesting. I will be going through it more thoroughly next weekend when I find the time.

Yes - Ubuntu Studio, actually! :slight_smile:

Yes. The result should (hopefully) one day sound like that.
Just that at the moment I do not yet have vocal accompaniment.

Ok, I will try that!
Since we are at it: What video export format would you suggest I use in Kdenlive? This is what Kdenlive has to offer:

So far I have been using the format that is selected, and the resulting video files are pretty small. But I do not want to lose sound quality here if it is not necessary.

Best,
Forumsnutzer

Again, it depends on the source and the target; there are many parallels between Kdenlive and Ardour.

Just as Ardour projects have an audio resolution, which is usually defined at the start of the project and is based on how you set up your audio settings, Kdenlive has a resolution too, although it’s easier to change it in Kdenlive after the initial setup.

The resolution, in Kdenlive’s case, is video resolution (2K, 4K, 1080p, etc.) and number of frames per second. This is set in the project settings.

You should set this to the resolution of your video camera. If you are recording on an external camera and then importing the file, Kdenlive will (I believe) prompt you to change the project settings to match the imported file.

You can also set how many audio channels you want - normally this is 2 for stereo and you probably don’t want to change this.

I believe the audio resolution on Kdenlive is set to 48kHz and 16-bit, but I may be wrong. But you won’t go far wrong exporting audio from Ardour at these settings if you plan to import it to Kdenlive.

Then, when you have finished editing the project, you can chose what format to export the file in (again, similar to Ardour). Note that the terminology Kdenlive uses for “export” is “Render”. The render format is, typically, a format which is reduced in some way compared to the project format because you will be targetting a particular playback ecosystem.

If you are looking to upload to Youtube, for example, then you can generally use the project resolution and frame rate. You will want to use a “progressive” scanning format rather than an “interlaced” one (there are often indicated by a “p” or an “i” at the end of the format.

Note that, I think, the “Generic” settings in the Kdenlive render options are generally the best for things like Youtube. These will, as I understand, use the project resolution, which is normally what you want.

As to which format, mp4 is a good generic one. WebM-VP9 is probably a good one for Youtube.

Note that you can use a Lossless/HQ setting, but this generally not a good idea: you’ll end up with a massive file which will take an age to upload, and Youtube will compress it to WebM or similar anyway.

Frankly, the quality of a good 1080p mp4 will far exceed your ability to make a video that needs more than that, especially when you are starting out.

And some further advice:

There is an equivalent for video:
The biggest upgrade you can do for your video recordings is, almost always, to improve your lighting.

Cheers,

Keith

1 Like

Thank you, Keith! I will take your advice as starting point for my further explorations. :slight_smile:

1 Like

This topic was automatically closed 28 days after the last reply. New replies are no longer allowed.