Export wishes and sticking tracks together

The new features in Ardour are excellent, but I wanted to make 2 suggestions for extensions. For this I have to describe my way of working:

Once a year we make an audio book including a performance of a theatrical text. We rehearse one week, then there is the dress rehearsal, where we repeat if mistakes occur. I listen to everything in the night. Then there are correction recordings before the performance and then the performance. The whole thing is recorded by an OB truck with Mac and I think ProTools.

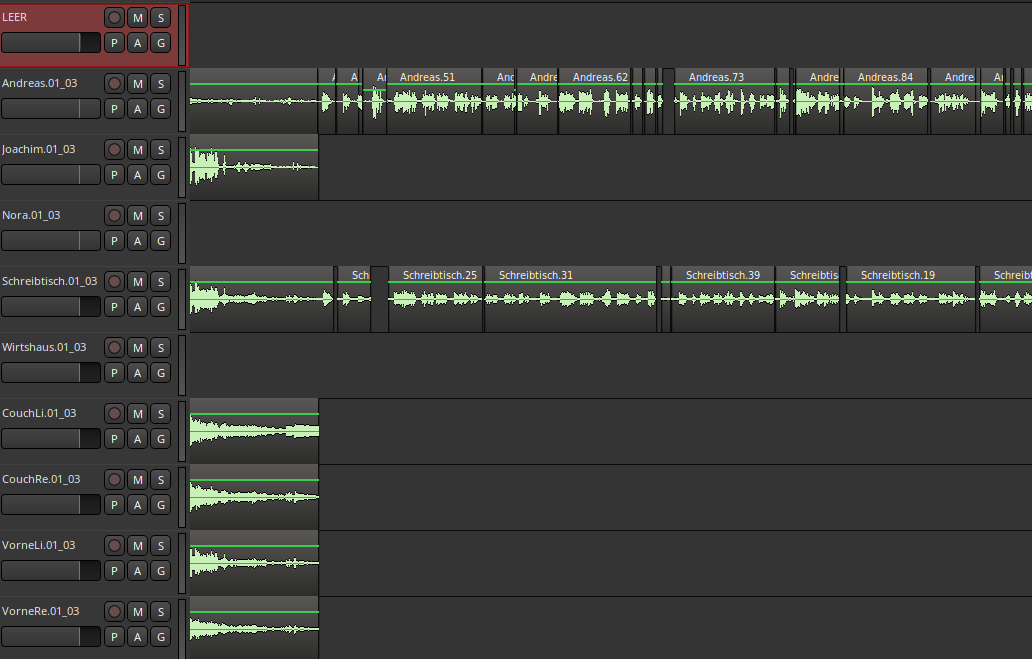
I get all the tracks and I import them into Ardour, cut them and then export them back to the studio for mastering. In the current project I have 3 x 13 tracks (3h - 1.day, 80 min - performance, 30 min - corrections).

1st wish export

It would be very helpful if I could export all 39 tracks as mono files with one click. It works now too, but very complicated. I export only 2 tracks at a time, give one to the left and the other to the right and select the mono option.

  1. wish to glue tracks together so that they cannot be moved against each other

I often cut on the way, on the train, in theatre breaks, etc. and it happens to me again and again that one of the 13 tracks slips against another track without me noticing it, although I am extremely careful that this doesnā€™t happen. Once it was only a tenth of a second and I destroyed 4 days of work. Everything else should be possible of course, deleting single parts of tracks, moving them in the timeline etc. etc.

I hope I have described it clearly and also I hope that it does not already exist and I am too stupid to understand itā€¦

1 Like

You can already export multiple tracks as mono, or just export them as stereo and batch split them with SoX afterwards.

You can link tracks together by grouping them. - https://manual.ardour.org/working-with-tracks/track-and-bus-groups/

@DHealey

sorry you are right for the export - I tried to export yesterday 5 tracks and there where all empty - I have no idea why - I tried it 2 times???

With groups, I know how to work, but this does not help me. I just can show you a simple part where I use just 2 mics

, how it looks like, because I am just on the beginning - I always start with the simple parts, to train myself, but I have parts with 15 tracks scattered all over the the 39, which you cannot overlook .
I have to cut first the text, then the music, and again sometimes some text, because its all the time a challenge to fit everything on the CD. So at the end I have to move all those parts around, which are not fitting on the screen. If you make just one single error, you do not check, especially in this last part of the process you are lost.
In the meantime I make daily snapshots, to avoid bigger troubles, but I think this case would not be a problem, if they will glue together from the beginning, because the tracks never in the whole project get moved against each-other.

I am not a professional cutter - so if nobody needs a feature like this, no problem, I just thought it could also be useful for others. And I have no idea, if this could be technically realized.

I would also find this very useful when the stems are going to be transferred to another mono channel.

You can split to mono from the Master export, but not in the stem export dialog. When you stem export mono channels you get stereo files.

It would be nice to have a checkbox in the stem export dialog for mono output. Of course the panner would be bypassed, but if you need a mono export you already want that.

I invested yesterday the whole day to find out, when in my working process this shift of tracks happens. I cannot work only with groups - a noise, a crackl is often only on 1 track - and It happens only, when I select a single track with the mouse - not with the trackpad - when you click the button and move in the same moment the mouse very little. I changed the surfaces, it still happened, I glued pieces of felt to the bottom of the mouse, but then moving tracks around was a pain. And I donā€™t want to work like a lame duck, because I would need 2 month and not 1 month.
So for me now the solution is to split my workflow - all the group work, I do with the mouse and when I work on a single track, I unplug the mouse and do this with the trackpad.
Another technical solution, than glueing tracks together would be, to split selecting and moving tracks. I never select a track and move it at the same time - I select it and then take it and move it. If it would not possible, to move a track, when I select it, it would not happen.

I would like to take this opportunity to describe a few things that are not very well solved for my workflow. I would say 70% of my work is cutting and moving arround files.

I dont understand, that, when I switch from the hand to the scissor, the selected files are unselected, I have to select the tracks in the left window again and just the I can cut them - I dont understand the advantage of this behavior and and even if this process is already relatively automated in the meantime, every time the thought comes up why?

The next case is to copy and paste multiple files on not following tracks. I have 3 x 9 tracks. For one part of the play I copy files from track 1, 4 and 7 from the corrections and want to paste them to same part of the performance. OK I put the mouse on the first track on the position, where I want the files and press strg V and it pasts, but in track1,2,3 - still here the question why? for what this could be used for?
I mean its possible - you have to select track 1,4,7 on the left track window, put the mouse on the 1 track on the position and then it pastes correct. I think, it also interrupts the workflow.

and last case I think, is a bug. Until now in my plays, I had maximum 3 x 9 tracks and I left the parts in tracks, where they origin from - so I always know, this part is from dress-rehearsal etc. just in case on the end I have to change something. 27 tracks on a full hdmi screen are able to handl. 39, I think not. So I created an empty track under reach track of the perfomance, where I copy the files of the other parts - so it will be 26 tracks on the end.

So I have 4 groups - 2 groups for the actors and 2 for the music, but it is not 9+9+4+4 its 1,2,1,2 and so on. I select one track in group 1 and do something, evrything ok, the same with group 2, but when I select both groups, I can select all files from the first group, but only the first file from the second group - all other files from the group stay unselected.

And this is not a bug, just a wish - it would be cool to make a super group - like 1+3 together as group 5 and 2+4 as group 6

Hi kultex,

Regarding your question about ā€œexporting all 39 tracks to mono filesā€. You should first select all your tracks (Ctrl+T {Cmd+T on mac} is a shortcut for that) use Session->Export->Stem Export. That will export the selected tracks and time range(s) as individual wavefiles.

Regarding your comment about slipping the tracks accidentally: you should enable the ā€œLockā€ mode in the upper-left corner of the editor. That prevents regions from slipping left and right on the timeline. You can still cut, trim, and fade the regions but they wonā€™t move out of place.

Regarding your comment ā€œI destroyed 4 days of workā€ ā€¦ youā€™ll find a backup snapshot in the ā€œbackupsā€ subfolder. In these cases you can sometimes find the last-known-good snapshot and start from there. But if youā€™ve continued 4 days without noticing ā€¦ yes that is a big problem. Depending on the makeup of your session, you -might- be able to use the ā€œregion->natural positionā€ to recover from this.

In general, it sounds like you are doing a lot of region object edits (using scissor tool, etc) when you might find it better to use the Range tool. For example you can use the Range tool to select a range of time and tracks, and delete it. This accomplishes a task that would require a lot of separate region splits and selections, in one swipe.

I hope these comments help!
-Ben at Harrison

Hi Ben,

thanks a lot for your help - the Stem Export I will definite try.

I know the ā€œLockā€ mode, in the first phase, no way - I select, cut, move, listen, cut move, listen etc. etc. Maby for the now second phase, it might be a possibility, there I remove crackles from single tracks - then I could do this with the mouse. But often, when I remove a crackl, I have to copy in a breathing from nearby and this I have to move until it fits - so I dont think, I will use the lock mode.

And I use the range mode for cutting out the crackles, but for the beginning when I listen and reaarange the regiones, maybe the pause between two words is to long, so I cut it exactly where I want, move it over and and overlap it and it often fits - or the pause is to short, I cut it in the middle, open the gap and trimm both ends a little bit and often its ok - I am used to it and it was just to mentionā€¦

thx Thomas

I forgot one I think important thing, when you are working with copy & paste of multiple tracks. After you select the tracks, where you want to paste the regions and you forget to put the mouse into the regions window, you will not see any pasted regions.

But dont think, the pasted regions disappear - you will find them all in the first minutes of your project. Therefor I all the time leave some 5 minutes empty on the start, when I cut, because I always find some lost childs thereā€¦

I finished my project yesterday and I think, I found the bug - it happened 2 times, that one track was moved against the other tracks. Thanks good I found a correct version in the backup, so both shocks was just a loss of 2 hours.

When I was in the push mode - I hope thatā€™s correct in english, because my Ardour version is in German - it should be lock, push and glide - after I removed a crack and then insert e.g. a breathing, Ardour does strange things, that you cannot correct with strg +z. Its not happening on lock and glide.

I continued to work only in glide mode, because inserting in lock mode, is a pain - it never appears on the place it should be - so in glide mode no more problems.

I have to verify, what really happens, but maybe just in a week, because I am 1 week on holidays nowā€¦

Hmm in English I believe you are referring to Lock, Ripple, Slide. Ripple is intended to do exactly what you describe, when you delete a section it closes the gap created by moving the contents of the track later in time to the left to but up to the contents remaining on the right.

I would suggest Slide mode until you have everything locked in time where you want it, then using Lock mode can make sense. Also donā€™t forget about keybindings, which for that is ā€˜1ā€™

  Seablade

ok - thanks for explaining this. So I think, that this is also a problem of translation. Because Ripple has nothing to do with the german word Schieben.

And its also a problem of not reading the manual carefully, but the meaning of Sperren - Schieben - Gleiten is so clear, that I did not think, think to read the manual.

Schieben means, that I can move the regions only along the track, nothing else. I try to find a german word, that describes ripple and that, what it does

That is actually true for ripple mode. In recent versions you cannot more regions across tracks in ripple-edit. ā€œDurchschiebenā€ would be an appropriate verb, but itā€™s too long for the GUI dropdown.

FWIW, I also find ā€œGleitenā€ weird for ā€œto slideā€, itā€™s supposed to be ā€œ[herum]rutschenā€.

PS. Would be interesting to know what other DAWs use for those. These edit modes are pretty common.

PPS. Why not use Ardour in English? Learning a bit of DAW English is easier that learning to mix, and also helps to communicate with other mixing engineers. :slight_smile:

I admit that I was a bit lost when it came to translating these three terms lock, ripple and slide, and also find them suboptimal to say the least. I missed to discuss these anywhere here in the forums or on IRC. Maybe ā€œ(an)schlieƟenā€ would be OK for ā€œrippleā€? ā€œrutschenā€ might work but also sounds strange to me.
Anyway Iā€™m all open for suggestions and will happily update german translation when there is consensus.
Also when I eventually can find time Iā€™ll try and find out how other DAWs call these functions if exist.

1 Like

I think ā€œWogenā€ would be in my opinion the correct translation. The problem for me is, that ā€œSchiebenā€ does not convey the fact of an active advancement from other regions. ā€œSchiebenā€ is something I do. With ā€œwogenā€, I think, I would have immediatly checked the manual.
ā€œNachrĆ¼ckenā€ or ā€œAufschlieƟenā€ would express for me that active movement.

Thatā€™s not a verb for an operation, is it?

no - not a verb for an operation, but it has something to do with flow and move - in french it would be ā€œondoyerā€, which is probably more nearā€¦

you normally use it for the see, the wind, but also peopleā€¦

FYI:

In Samplitudeā€™s German language manual these are the menu options and descriptions:

Objekte der aktiven Spur verbinden
In diesem Modus werden alle Objekte auf der aktuellen Spur ab der Mausposition gemeinsam ausgewƤhlt und verschoben.
Objekte aller Spuren verbinden
In diesem Modus werden alle in Ihrem Arrangement vorkommenden Objekte gemeinsam ab der Mausposition ausgewƤhlt und verschoben.

verbinden (de) == combine (en). While the description works (all later regions are treated as compound), ā€œVerbundā€ might work, but also is a noun. Operations are usually verbs, in case of the edit-mode it an adjective could work as well though.

Premiere in the German manual uses ā€žSchnittkante verschieben - Rippleā€œ

ā€œSchnittkante verschiebenā€ is pretty good actually, but too long, so weā€™re back to ā€œ[ver]schiebenā€ :frowning:

As for English alternatives to ā€œrippleā€, a quick brainstorm on IRC:

  • shift
  • cascade
  • collapse
  • trickle

Naming things is hard. An alternative would be to replace those by icons, with a longer descriptive tooltip.

For me at least, those alternative English versions do not capture ā€œrippleā€ very well at all. I also note that in the DE manual, Magix does use the English ā€œrippleā€ in parentheses at various points but, surprisingly, not for the actual ā€œrippleā€ modes.

In a related question, why does Ardour not offer the second option Objekte aller Spuren verbinden as presented in Samplitude/Sequoia/Pyramix/Reaper? In a complex arrangement it makes little sense to only offer single track rippling as it would mess up the rest of the composition or multi-track recording. I understand that you can insert silence but it seems more complicated than simply dragging an object to the right.

Itā€™s possible, if you explicitly select regions on other tracks.

One of the basic rules in Ardour is that every operation or tool only applies to the selection. So weā€™d need an exception to this rule. But itā€™s not unreasonable to add that at some point.

1 Like